Sigo esta semana avanzando en el curso sobre Flipped Classroom y en este bloque he estado trabajando en la creación de contenido para invertir la clase. Una de las principales herramientas o materiales que podemos utilizar para introducir y presentar contenido a nuestros alumnos/as en casa son los VÍDEOS.
Estos vídeos pueden ser creados por nosotros o los podemos buscar entre todos los vídeos ya creados que existen, siempre que hagamos una buena selección y estos se adapten a los contenidos que queremos trabajar y a las características de nuestros alumnos/as.
Una vez creado o seleccionado el vídeo podemos hacerlo más interesante e instructivo para nuestros estudiantes si incluimos PREGUNTAS sobre aquello que están viendo. Estas preguntas les sirven a los alumnos sirven para mantener la atención y realizar una visualización activa y a nosotros para comprobar si el contenido se está entendiendo.
Una herramienta muy útil para insertar preguntas en los vídeos es EDPUZZLE. Usando esta herramienta, yo he incluido algunas preguntas en este vídeo creado para explicar los tipos de mezclas en 4º de Primaria en el área de Ciencias Naturales.
Os animo a que le echéis un vistazo si todavía no conocéis esta herramienta tan útil e interesante. Thanks and... see you soon!
Una forma de organizar el trabajo por equipos en el aula es asignar diferentes roles a cada uno de los miembros. Para formar los grupos es importante tener en cuenta las características de los alumnos y formar grupos equilibrados.
En Science muchas de las actividades realizadas se han llevado a cabo a través de grupos de trabajo colaborativo repartiendo roles de equipo o "team roles". Yo he trabajado con grupos de 4 alumnos y 4 roles diferenciados:
Coordinator.
Speaker.
Secretary.
Controlling.
Esta forma de trabajo puede resultar un poco complicada al principio y no es muy útil para los primeros cursos, debido a su complejidad, pero una vez los niños aprenden la función de cada uno de los roles, el trabajo se agiliza y ellos mismos son capaces de autoregularse.
Yo he utilizado estos paneles para ponerlos en un lugar visible de la clase (se pueden imprimir y plastificar para usar más veces) junto con tarjetas con los nombres de los alumnos. Para cada actividad o proyecto, repartíamos los roles y quedaban durante todo el tiempo en el aula, así ellos pueden echar un vistazo a las tareas asignadas a cada rol.
Os dejo las plantillas por si os resultan útiles:
Yo he usado el tema de los superhéroes, pero lo podéis adaptar según las características, edades o gustos de vuestros alumnos. Os dejo también algunas láminas relacionas que pueden ser útiles para el manejo de la clase.
To finish with the topic about the matter and apply all our knowledge we've prepared a Science Fair! To learn what's a Science Fair we watched this video:
We thought it was a great idea so, we prepared our own Science Fair. Fisrt of all, we divided into groups of four and we shared the different experiments. They were related to different aspects about matter: chemical changes, heterogeneous and homogeneous mixtures and light.
We worked in groups with different roles (speaker, controlling, secretary and coordinator) and we followed a 'Registration worksheet' to take notes about all the process of the experiments.
Write the materials. (Lesson 1).
Think a hypothesis. (Lesson 1).
Do the experiment and write the process. (Lesson 2).
Check the hypothesis and write the conclusions. (Lesson 3).
Finally, with the information of the worksheet, the experiments and pictures we prepared a poster to show our work to our classmates. Do you want to see the results? Here you have!
Learning about matter isn't easy, but we became scientists and we made a mini-book to collect all our learnings about this topic.
We worked in groups with collaborative learning, practising and experimenting in class about all the aspects related to matter: mixtures, changes, thermal conductors and insulators, etc.
We learnt how to extract specific information of texts, how to complete a mind map or how to follow instructions to make easy experiments.
These are some materials we used and our mini-books:
Here you have the worksheets we use to make our mini-books:
We learnt a lot about matter and we tested ourselves with a great activity: a boardgame! The best way to learn new things is playing and we preapred a 'Trivia Game' to review all the contents about this unit.
First of all, we divided in groups of four and each gruop prepared some questions and answers about matter (atoms, molecules, mixtures, changes, etc.).Then, we wrote these questions and answers into the cards and we also decorated the board.
These are the materials we used:
Finally, we played in the class in groups, we had a lot of fun and we learned a lot!
In our study about matter, we learnt about renewable and non-renewable energy sources and we understood that is really important to take care of our planet and use more renewable energy.
We also worked about 'The Three R's' and how can we help to protect the earth in our daily life. Do you want to know all the things that we learnt? Here we go!
First of all, we watched this video about the 3R's: Reduce, Reuse and Recycle.
After that, we divided into four gruops of six people and we looked for information about these topics. With this information, we worked together to prepare four posters about this.
We also explained to our classmates the information of our posters and, finally, this was the result:
Our study about matter is on a roll! It is an interesting, but a bit diffucult topic, but we're learning a lot. To practise all the things we've learnt we played different games and interactive activities.
This month we're learning about... MATTER! What an interesting topic, isn't it?
We tried to learn things by doing them and the best way to know the properties of matter and all its characteristics is experimentig with it. But, before that, we have learnt a lot of things about matter through some videos.
These are the videos we watched at home and in class:
We are learning about healthy eating and healthy habits and this week we did an experiment to comfirm that soft drinks, like cola or lemonade, are unhelathy for us. Do you want to know how we did it? Here we go!
First, we watched a video to introduce the topic and to dicuss why should we avoid soft drinks. This is the video:
Second, we prepared our experiment. To do this, we made six groups of four people and we shared the roles in the gruop (secretary, coordinator, controlling and speaker). Once we had the goups, we watched other video to know how to do the experiment.
These were the materials we needed:
3 plastic cups.
Cola, lemonade and water.
Labels and markers.
Dirty coins.
Registration worksheet.
The fist step to do an experiment is to make a hypothesis. So, we asked our selves: what is going to happen to the coins inside the different drinks?
Then, we put the drinks in the plastic cups and the coins into the different drinks: cola, lemonade and water.
And we waited for two days...
When we picked up the coins from the drinks, the result was amazing... the coins inside the cola and the lemonade were brilliant, but not the coin into the water!
So, our conclusion was clear: Soft drinks are really unhealthy for us! But not to clean coins... ;)
Moreover, all our hypothesis, notes and conclusions were registered in a registration worksheet like this:
We are learning about healthy eating and habits. Do you want to know which activities have we done? Here we go!
To learn about the different food groups and nutrients we listened to this funny song and we also watched the videos of this YouTube channel. They're great!
We also played this interactive activity to classify the food according to the different food groups. Try it!
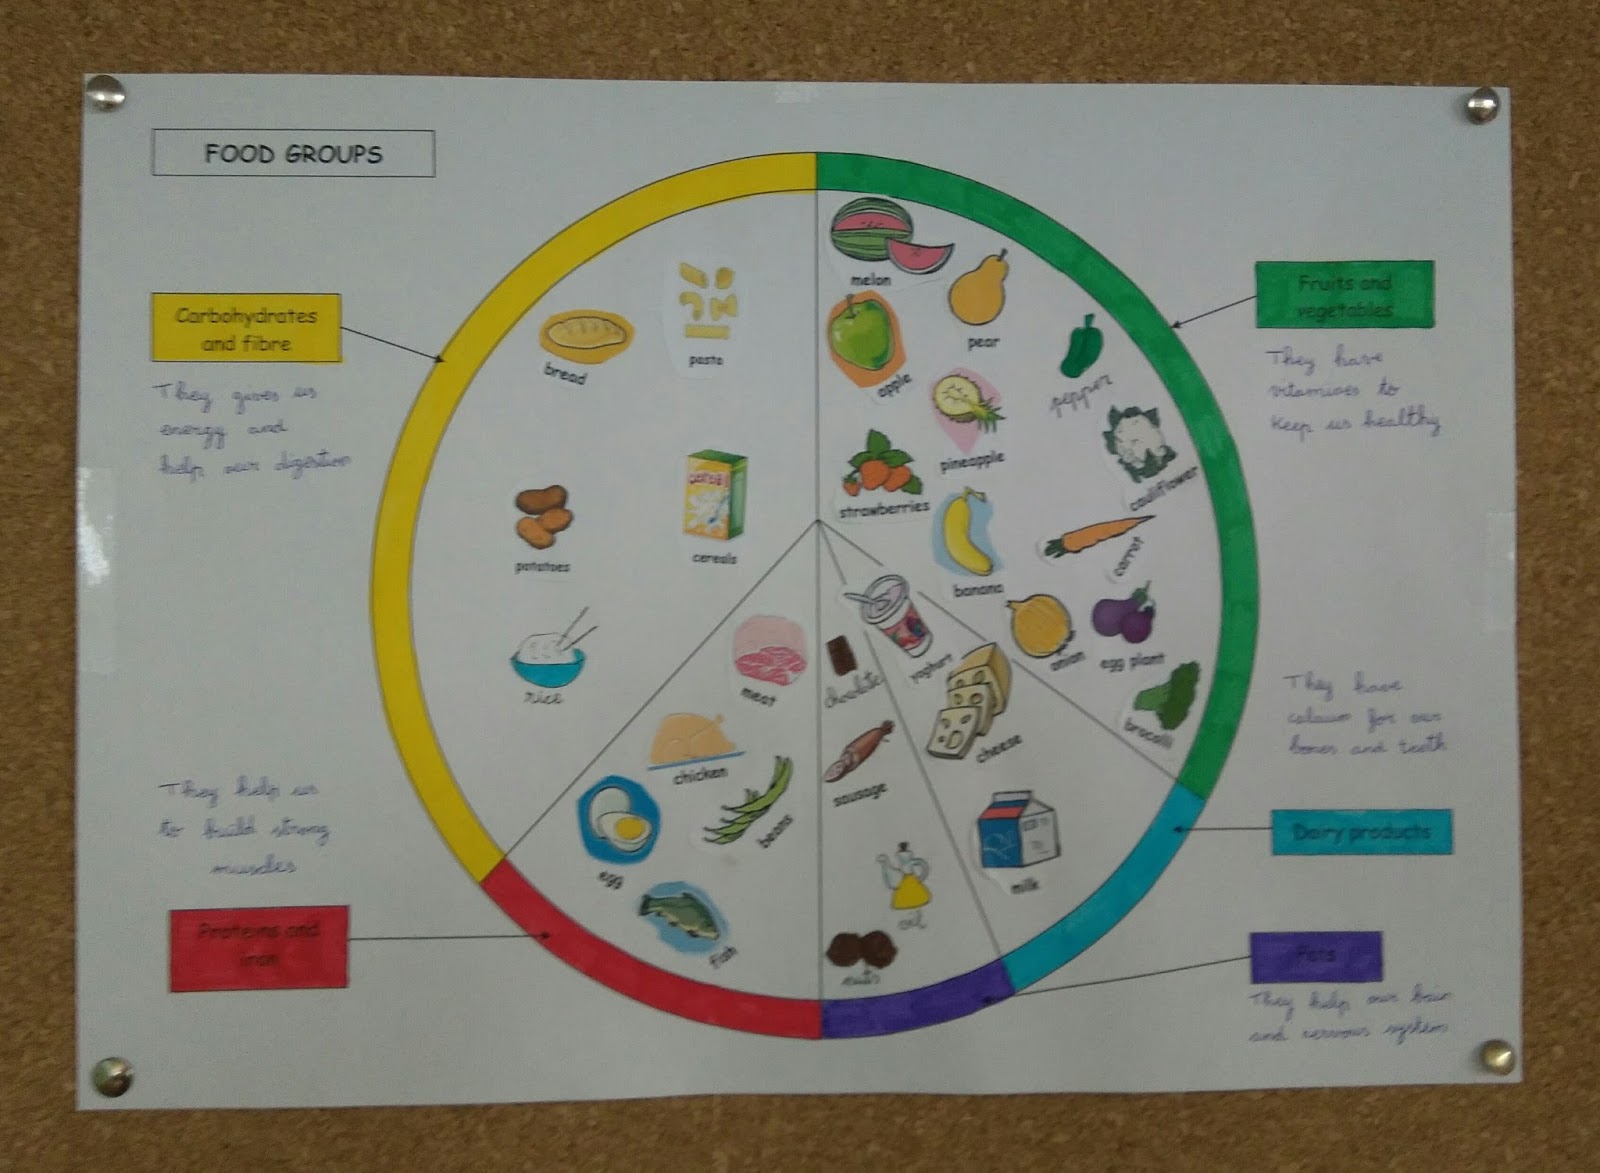
Finally, we prepared these posters about the food groups and nutrients.
After all this work and activities, we were prepared to do our projects about the body systems. First, we formed groups of six and each group became expert in one of the body systems. We chose the systems related to the life process of the nutrition, so our projects were about: digestive, excretory, circulatory and respiratory systems.
To do the posters we used this material:
Colour A3 cardboards.
Colour A4 papersheets.
Pictures of the four body systems.
Information.
Crayons, scissors and glue.
This was the result:
After doing the posters, each goup did an oral presentation for the rest of the class. We learnt a lot!
Other activity we did about the body systems was labelling the different parts. First we chose the parts for each system, then we labeled the names and finally we explined the function of each part.
These are the digestive, excretory and respiratory systems we did:
We continue learning about our bodies and body systems and we have tried some interesting on-line activities to practise because playing is the best way to learn new things.
Here you have some of these games:
The body runner with activities about the lungs, the heart and the digestive system.
Circulatory system quiz. How many questions can you answer right?
A matching game about different parts and organs of the body.
We are learning about the human body and the body systems. To work and learn a lot of things about the parts and the fuctions of our body we have watched some videos.
Here you have some interesting videos about the body systems: